


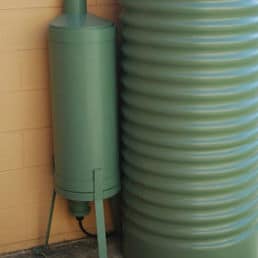
Rain Harvesting Post / Wall Stand Water Diverter
A large and versatile unit that can be mounted in different places to keep highly contaminated water out of your tank.
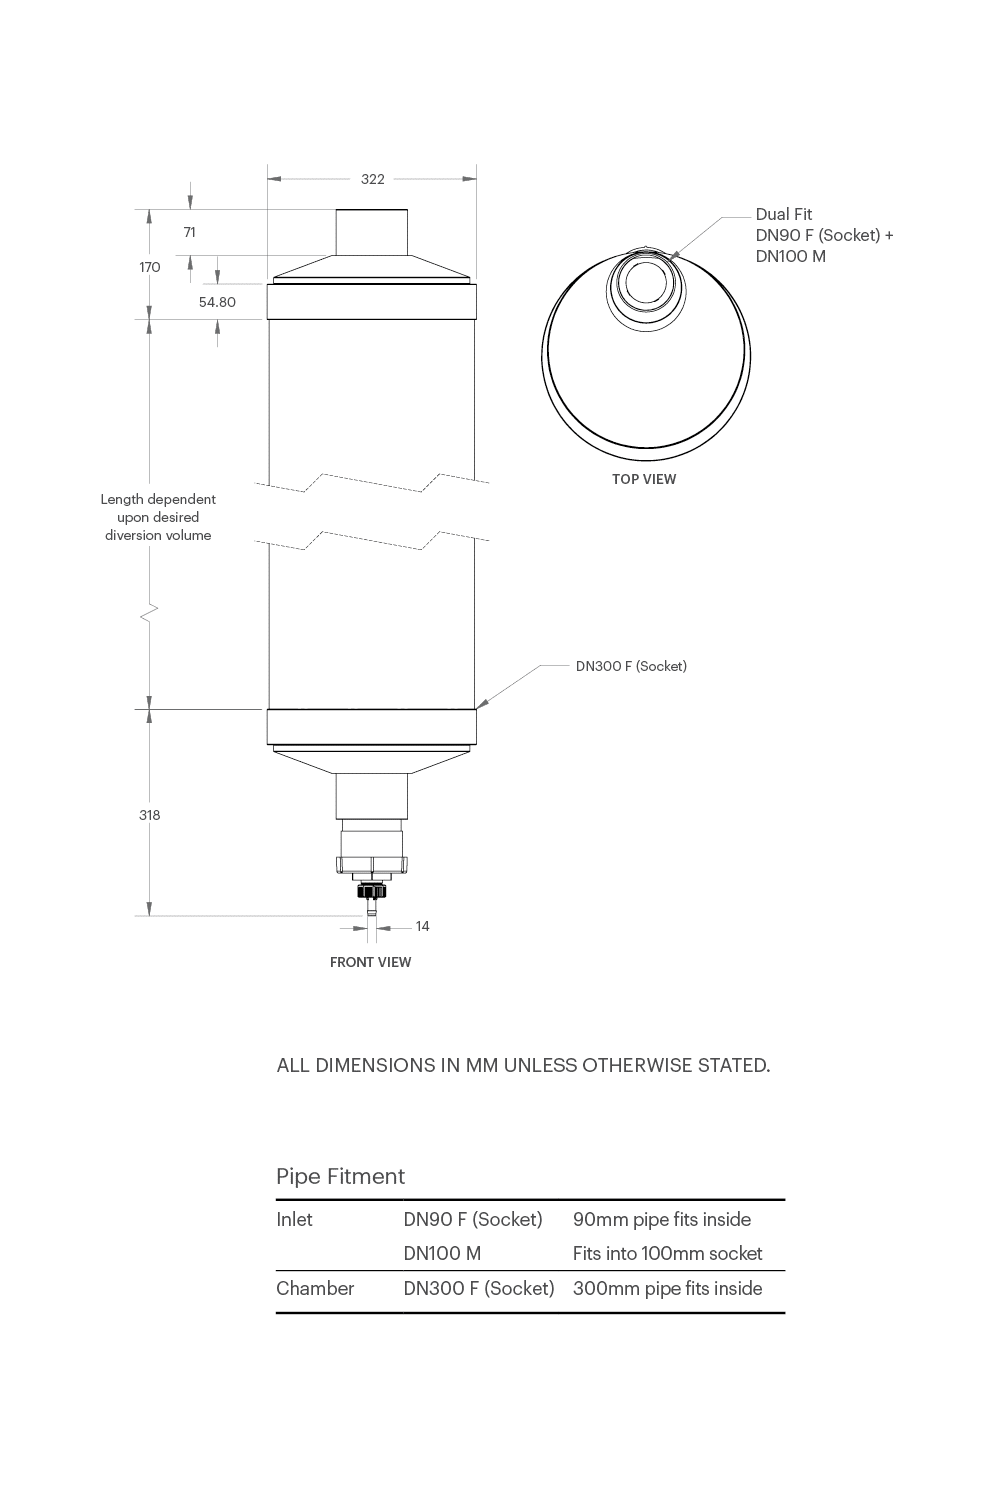
WDPW01 | 90/100mm
WDAC09 | 300mm Chamber
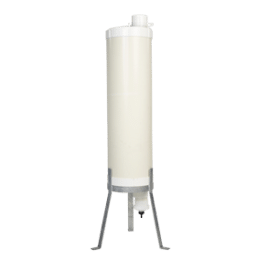
WDAC01 | Steel Stand (Optional)
Protect your rainwater quality
By preventing the dirtiest and most hazardous water from entering your rainwater tanks, this first flush diverter protects your rainwater quality. The dirty water is collected at the beginning of each rainfall event and automatically drains away afterwards.
Install with ease
This versatile first flush diverter unit can manage water from single or multiple pipes. Wall, post and stand mounting options plus an all-parts-included kit mean installation couldn’t be easier. Simply add an appropriate length of pipe to divert as much as 150 litres as required.
Divert larger volumes
The First Flush Post / Wall is larger than many residential above ground first flush diverters, allowing you to divert more water. This makes it particularly appropriate for buildings with larger roof areas or places with heavy pollution and overhanging vegetation.
Calculate your diversion needs
Generally speaking, the more water you divert, the better the quality of the rainwater that ends up in your tank. However, diverting more rainwater than necessary can lead to volume shortages, so it’s important to calculate your diversion needs, and divert water accordingly.
The following formulas offer general guidelines for calculating how much water you should divert:
- Areas with low pollution (open fields, no trees, no bird droppings or animal matter, clean environment) = divert 0.5 litres of water per square metre of roof
- Areas with higher pollution (leaves and debris, bird droppings, animal matter/carcasses, pollution) = divert at 2 litres of water per square metre of roof.
This calculation will allow you to determine what length and size pipe or pipes you need for your diversion chambers.
The length of pipe required to form your first flush diversion chamber will depend upon how much water you need to isolate and capture.
The following measurements are given as a guide only.
Installation
Wall & post mount
- Screw your wall/post bracket to the wall at your chosen installation point. The outlet of your diverter must sit at least 150mm from the ground when fully assembled. The wall/post bracket supports the lowest end cap of your chamber so select your installation point and attach the wall/post bracket accordingly.
- Screw your wall/post bracket to the wall at your chosen installation point. The outlet of your diverter must sit at least 150mm from the ground when fully assembled. The wall/post bracket supports the lowest end cap of your chamber so select your installation point and attach the wall/post bracket accordingly.
- Attach the upper and lower end caps to your 300mm pipe by applying solvent weld glue to the socket and pipe before inserting the pipe into the end cap and holding until the glue sets. Repeat for the other end cap. Expect a tight fit.
- Place your assembled diversion chamber in the wall/post bracket and support as you fit your upper bracket around the inlet on the upper end cap and screw it to the wall/post.
- CAUTION: Failure to support the unit in the upright position while attaching the upper bracket could crack the bottom chamber cap.
- Select the appropriate flow control washer and fit it into the hose connector with the side marked “TOP” showing. Start by using the Control Washer with the smallest gauge hole (lowest number). Try a larger gauge Washer if experiencing blockages. Save the remaining washers for possible future use.
- Insert the plastic filter screen in through the base of the screw cap with O-ring seal and secure by attaching the hose connector and flow control washer.
- Apply solvent weld glue to the socket of the threaded coupling and one end of the 90mm length of 90mm pipe. Insert the short section of pipe into the socket and hold until the glue sets. Insert opposite end of this short section inside the lower end cap outlet after applying solvent weld glue.
- Insert your Primary Filter Screen in the lower end cap, then attached the screw cap with O-ring seal (and assembled components) to the threaded coupling.NOTE: For some end couplings you may be required to remove and discard the molded keeper ring from the bottom of the Primary Filter Screen.
- Place the ball inside your first flush diverter chamber through the upper end cap inlet.
- Measure your existing downpipe and cut to create space for a T-junction. Ensure all cut edges are clean and smooth.
- Insert the ball seat into the top of the upper end cap inlet, with the narrow end of the seat facing down.
- If you’re fitting your diverter to a 90mm T-junction, cut a length of 90mm pipe to connect your diverter and T-Junction. Attach the pipe hard down on top of the ball seat, then attach the T-Junction hard down on top of the pipe.
- If you’re fitting your diverter to a 100mm T-junction, attach the 30mm length of 90mm pipe hard down on top of the ball seat and glue in place using solvent weld glue. Fit the T-junction around the upper end cap inlet or, if required, connect the T-junction and upper end cap inlet using an additional length of pipe.
- Connect the T-junction to the existing downpipe using solvent weld glue.
Stand Mount
- Determine the length of 300mm or pipe required for your first flush diversion chamber using the table below and cut accordingly. Ensure all cut edges are clean and smooth.
- Attach the upper and lower end caps to your 300mm or pipe by applying solvent weld glue to the socket and pipe before inserting the pipe into the end cap and holding until the glue sets. Repeat for the other end cap. Expect a tight fit.
- Place your assembled diversion chamber into the stand, being sure to line up the centre of the chamber outlet with the weld on the stand.
- Select the appropriate flow control washer and fit it into the hose connector with the side marked “TOP” showing. Start by using the Control Washer with the smallest gauge hole (lowest number). Try a larger gauge Washer if experiencing blockages. Save the remaining washers for possible future use.
- Insert the plastic filter screen in through the base of the screw cap with O-ring seal and secure by attaching the hose connector and flow control washer.
- Apply solvent weld glue to the socket of the threaded coupling and one end of the 60mm length of 90mm pipe. Insert the short section of pipe into the socket and hold until the glue sets. Insert opposite end of this short section inside the lower end cap outlet after applying solvent weld glue.
- Insert your Primary Filter Screen in the lower end cap, then attached the screw cap with O-ring seal (and assembled components) to the threaded coupling.NOTE: For some end couplings you may be required to remove and discard the molded keeper ring from the bottom of the Primary Filter Screen.
- Place the ball inside your first flush diverter chamber through the upper end cap inlet.
- Measure your existing downpipe and cut to create space for a T-junction.
- Insert the ball seat into the top of the upper end cap inlet, with the narrow end of the seat facing down.
- If you’re fitting your diverter to a 90mm T-junction, cut an appropriate length of 90mm pipe to connect your diverter and T-Junction. Attach the pipe hard down on top of the ball seat, then attach the T-Junction hard down on top of the pipe.
- If you’re fitting your diverter to a 100mm T-junction, attach the 12mm length of 90mm pipe hard down on top of the ball seat and glue in place using solvent weld glue. Fit the T-junction around the upper end cap inlet or, if required, connect the T-junction and upper end cap inlet using an additional length of pipe.
- Connect the T-junction to the existing downpipe using solvent weld glue.
- Securely bolt the stand and check to ensure that the pipework connected to the top of your First Flush Post/Wall is stable and the unit is not stressed by misalignment.
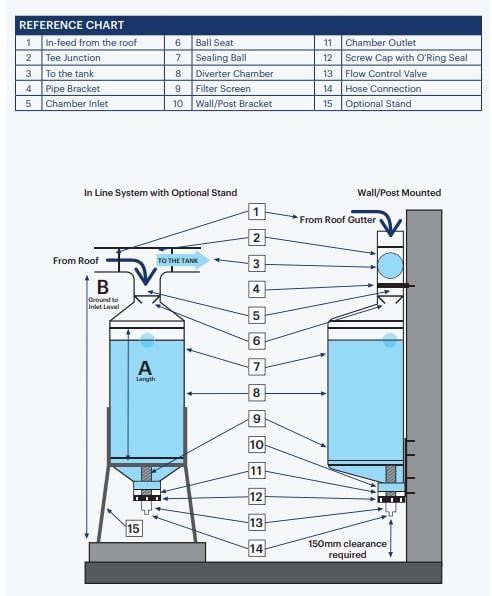
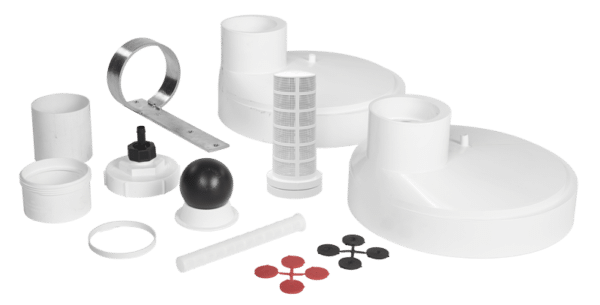
What’s in the box?
- Wall/post bracket
- Upper bracket
- 2 end caps
- Hose connecter
- 8 flow control washers
- plastic filter screen
- Screw cap with O-ring seal
- Threaded coupling
- Plastic filter screen
- Primary Filter Screen
- Ball
- Ball seat
- 90mm length of 90mm pipe (for joining end cap and threaded coupling)
- 30mm length of 90mm pipe (Ball seat ring keeper)